
Essential Guide to Driveway Pavers Installation Tips and Techniques for a Durable Finish,driveway pavers installation
- Hamie interlocking
- Mar 5
- 4 min read
Installing driveway pavers is a smart way to enhance your home's curb appeal while creating a durable surface that withstands daily wear. Whether you’re a DIY enthusiast or planning to hire professionals, understanding the right installation techniques can save you time, money, and frustration. This guide covers everything you need to know about driveway pavers installation, from preparation to finishing touches, ensuring a long-lasting and attractive driveway. driveway pavers interlocking installation.

Choosing the Right Pavers for Your Driveway
Before installation, selecting the appropriate pavers is crucial. Driveway pavers come in various materials, shapes, and sizes, each offering different benefits:
Concrete Pavers: Affordable and versatile, concrete pavers come in many colors and styles. They are strong enough for most vehicles but may require sealing to prevent stains.
Brick Pavers: Known for their classic look, brick pavers offer excellent durability and color retention. They are ideal for traditional or rustic home designs.
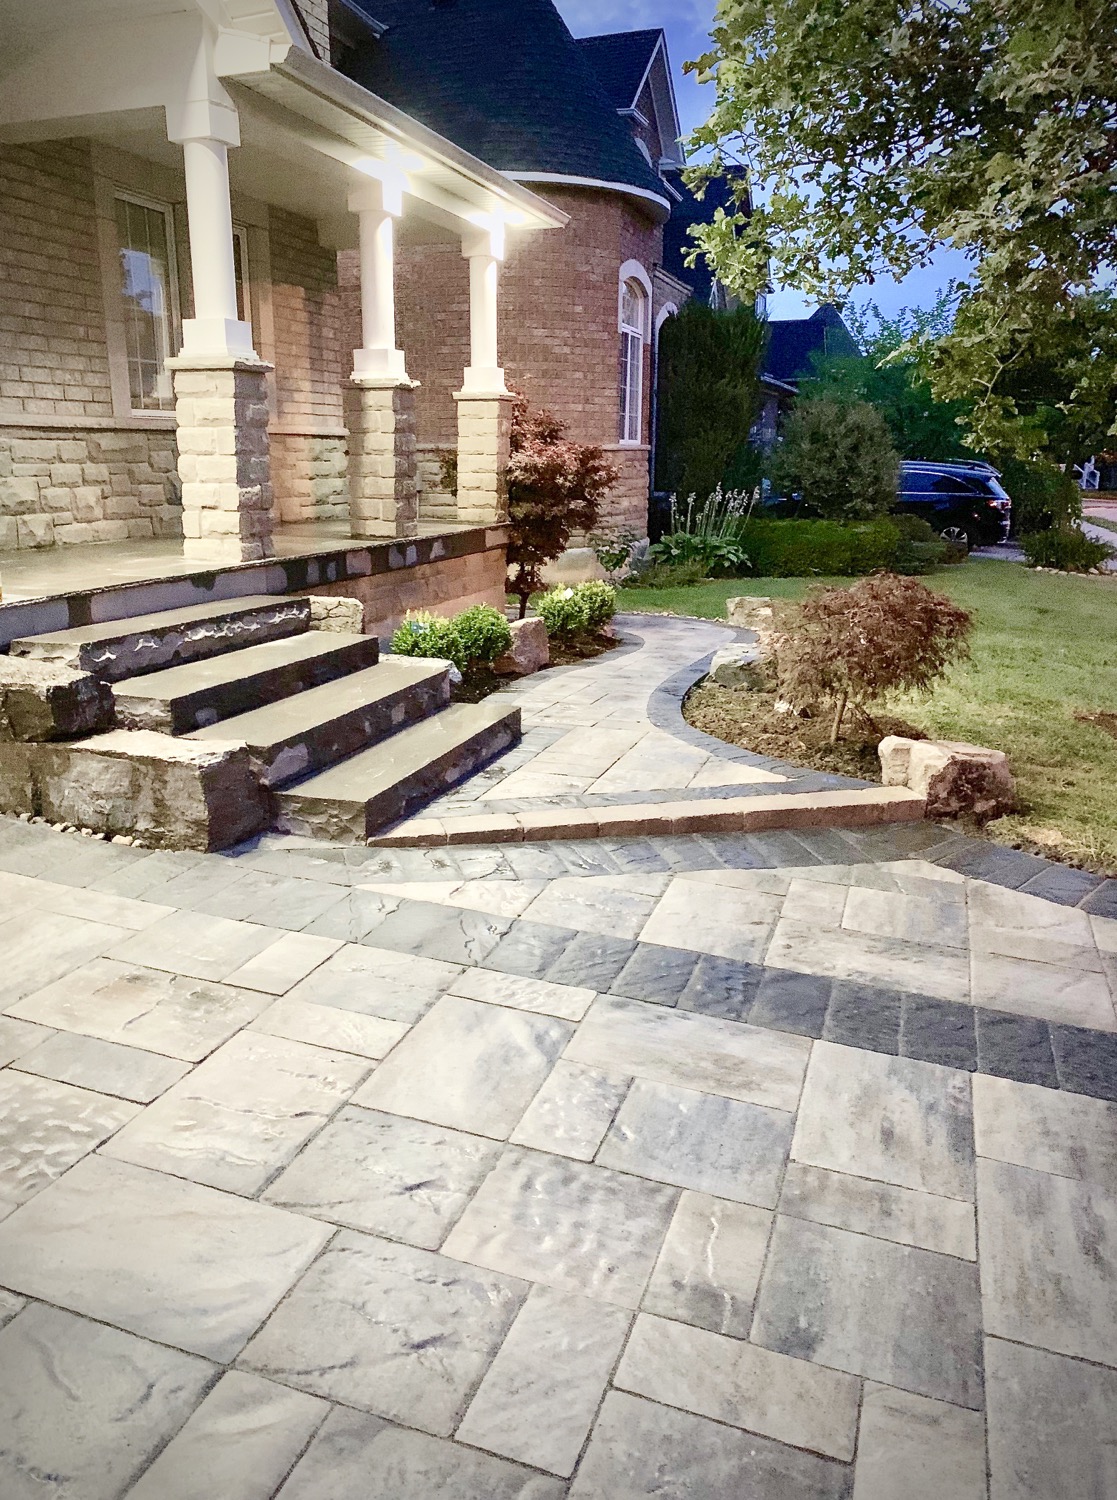
Natural Stone Pavers: Materials like granite, slate, or limestone provide a premium appearance and exceptional strength. They tend to be more expensive but add significant value.
Permeable Pavers: Designed to allow water drainage, these pavers help reduce runoff and are environmentally friendly.
Consider your climate, budget, and aesthetic preferences when choosing pavers. Also, check the thickness; driveway pavers typically need to be at least 60mm thick to handle vehicle weight. driveway pavers interlocking installation
Preparing the Site for Installation,
Proper site preparation is the foundation of a durable driveway. Follow these steps to ensure your driveway lasts:
Clear the Area
Remove grass, roots, rocks, and debris from the driveway area. Mark the boundaries clearly using stakes and string.
Excavate the Base
Dig down to a depth that accommodates the base layers and pavers, usually 8 to 12 inches depending on soil type and expected traffic.
Install a Sub-Base
Lay a sub-base of crushed stone or gravel to provide stability and drainage. Compact this layer thoroughly using a plate compactor to prevent shifting.
Add a Bedding Layer
Spread a 1-inch layer of coarse sand or stone dust over the sub-base. This layer helps level the surface and allows pavers to settle evenly.
Ensure Proper Slope
The driveway should slope away from your home to prevent water pooling. A slope of about 1/4 inch per foot is recommended.
Laying the Pavers Correctly
The installation technique affects both the look and durability of your driveway. Use these tips for a professional finish:
Start from a Straight Edge
Begin laying pavers along a straight edge such as a garage or sidewalk. This helps maintain alignment.
Use a Pattern
Common patterns include herringbone, basket weave, and running bond. Herringbone is especially strong for driveways because it locks pavers in place under heavy loads.
Maintain Consistent Gaps
Leave small gaps (about 1/8 inch) between pavers for joint sand. Use spacers if needed to keep gaps uniform.
Cut Pavers to Fit
Use a wet saw or paver splitter to cut pavers for edges and corners. Proper fitting prevents gaps and uneven surfaces.
Check Level Frequently
Use a level and rubber mallet to adjust pavers as you go, ensuring a flat and even surface.
Securing the Pavers with Joint Sand
After laying the pavers, filling the joints with sand locks them in place and prevents shifting:
Use Polymeric Sand
This special sand hardens when moistened, providing better resistance to weeds and erosion compared to regular sand.
Sweep Sand into Joints
Spread sand over the pavers and sweep it into the gaps using a broom. Repeat until all joints are filled.
Compact the Surface
Run a plate compactor over the pavers to settle the sand and pavers firmly.
Apply Water to Harden Sand
Lightly mist the surface with water to activate the polymeric sand. Avoid overwatering to prevent washout.
Maintaining Your Driveway Pavers
Proper maintenance extends the life of your driveway and keeps it looking fresh:
Regular Cleaning
Sweep debris and wash the surface with a garden hose or pressure washer to remove dirt and stains.
Seal the Pavers
Applying a sealant every 2-3 years protects against stains, fading, and weed growth.
Repair Damaged Pavers
Replace cracked or chipped pavers promptly to avoid further damage.
Control Weeds and Moss
Use weed killers or natural remedies to prevent growth between joints.
Common Mistakes to Avoid
Avoid these pitfalls to ensure your driveway pavers installation is successful:
Skipping proper base preparation, which leads to uneven surfaces and shifting.
Using the wrong thickness or type of pavers not designed for vehicle traffic.
Ignoring drainage needs, causing water pooling and damage.
Not compacting layers adequately, resulting in settling and cracks.
Overlooking joint sand application or using poor-quality sand.
Benefits of Professional Installation
While DIY installation can save money, hiring professionals offers advantages:
Expertise in site assessment and preparation.
Access to specialized tools like plate compactors and wet saws.
Efficient and precise laying of pavers.
Warranty on workmanship and materials.
If you choose to hire a contractor, check references and ensure they have experience with driveway pavers.


Comments