
Installing a Natural Stone Patio: A Natural Patio Installation Guide
- Hamie interlocking
- Apr 27
- 4 min read
Creating a beautiful outdoor space is one of the most rewarding home improvement projects you can take on. A natural stone patio adds charm, durability, and value to your property. It invites you to spend more time outside, enjoying fresh air and nature’s beauty. If you’re thinking about installing a natural stone patio, you’re in the right place. I’ll walk you through the process with clear, friendly advice that makes the project manageable and fun.
Why Choose Natural Stone for Your Patio Installation?
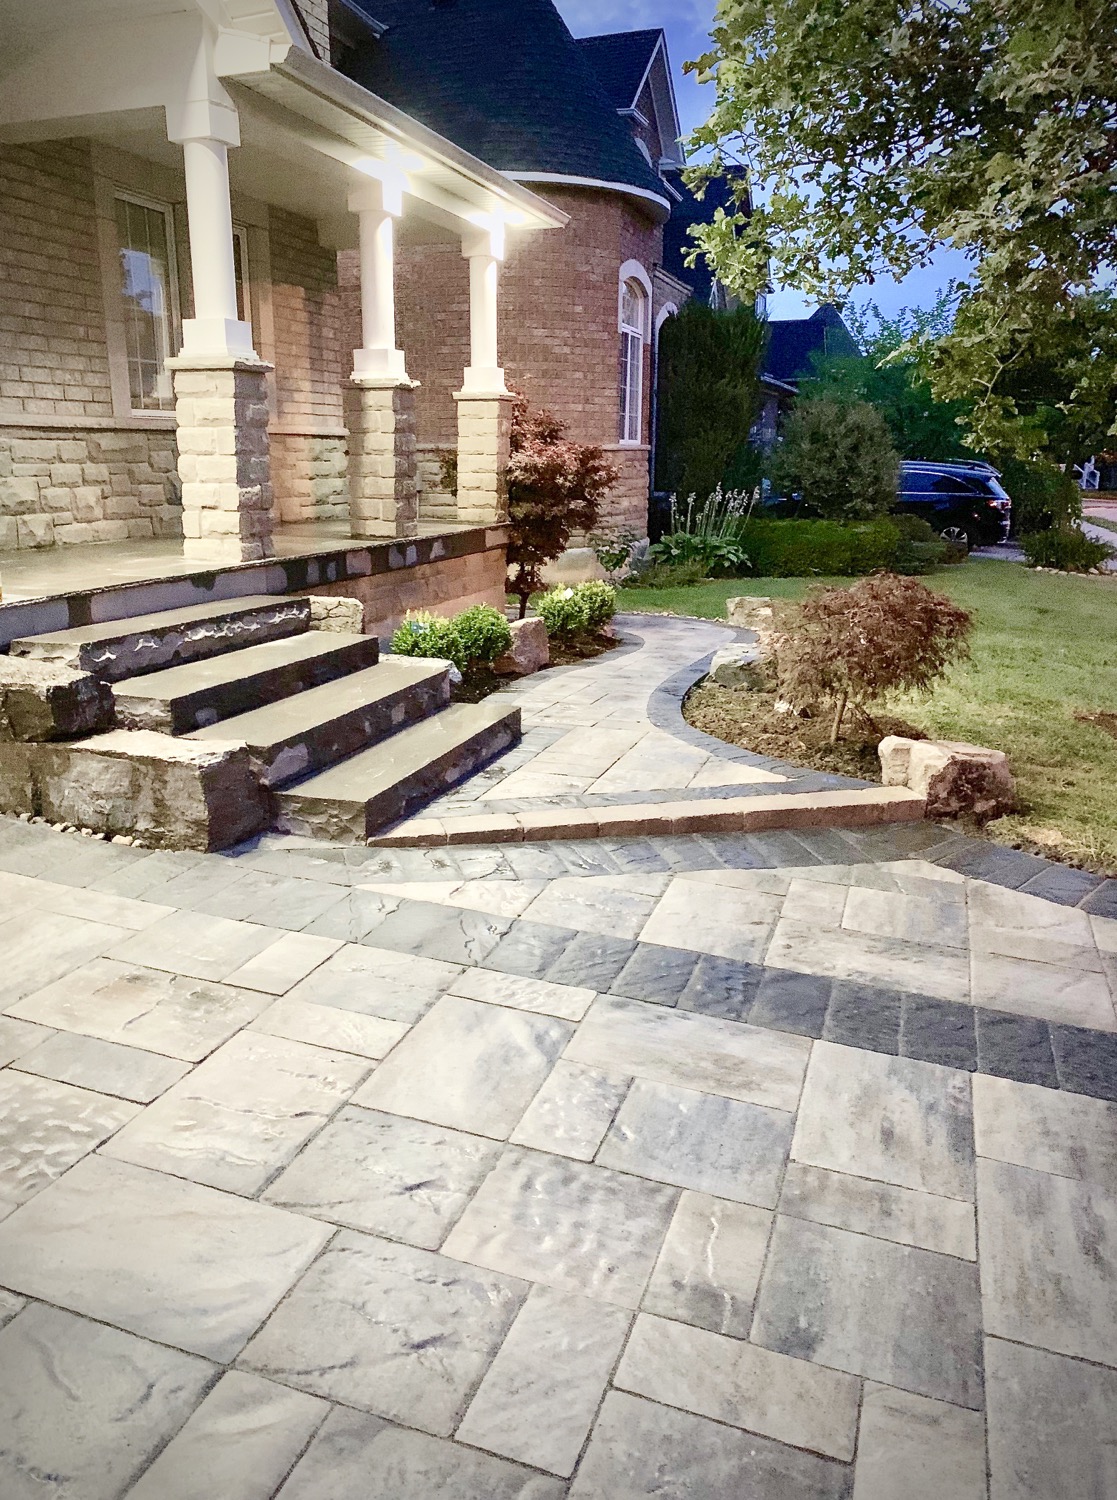
Natural stone offers a timeless look that blends seamlessly with any landscape. Unlike concrete or pavers, each stone is unique, giving your patio a one-of-a-kind character. Stones like flagstone, slate, limestone, and sandstone come in various colours and textures, allowing you to customize your outdoor space to your taste.
Natural stone is also incredibly durable. It withstands harsh weather, heavy foot traffic, and the test of time. Plus, it requires minimal maintenance compared to other materials. A well-installed natural stone patio can last for decades, making it a smart investment.
If you want a patio that feels organic and inviting, natural stone is the way to go. It complements plants, trees, and garden features beautifully, creating a harmonious outdoor retreat.
Steps for a Successful Natural Patio Installation
Installing a natural stone patio involves several key steps. Taking your time and following each one carefully will ensure a sturdy, attractive result.
Design Your Patio
Start by sketching your patio layout. Consider the size, shape, and location. Think about how you’ll use the space - dining, lounging, or entertaining. Mark any existing features like trees or pathways to work around them.
Choose Your Stone
Select stones that suit your style and climate. For example, flagstone is popular for its flat surface and warm colours. Slate offers a sleek, modern look with darker tones. Make sure the stone is suitable for outdoor use and won’t become slippery when wet.
Gather Materials and Tools
You’ll need stones, gravel, sand, a compactor, a level, a rubber mallet, and a saw or chisel for cutting stones. Renting a plate compactor can save time and effort.
Prepare the Ground
This is a crucial step to prevent shifting and settling. See the next section for detailed guidance.
Lay the Base
Spread and compact a layer of gravel to create a solid foundation. Then add a layer of sand to help level the stones.
Place the Stones
Arrange stones according to your design. Use a rubber mallet to tap them into place. Leave small gaps for sand or mortar, depending on your preference.
Fill the Joints
Sweep sand or polymeric sand into the gaps to lock the stones in place. Water the area lightly to help the sand settle.
Seal the Patio (Optional)
Applying a sealant can enhance colour and protect the stone from stains and weathering.

How to Prep the Ground for a Stone Patio?
Proper ground preparation is the foundation of a long-lasting patio. Here’s how to get it right:
Clear the Area
Remove grass, roots, rocks, and debris from the patio site. Use a shovel or sod cutter for efficiency.
Excavate to the Right Depth
Dig down about 6 to 8 inches to accommodate the base layers. The exact depth depends on soil type and stone thickness.
Level the Surface
Use a rake and a level to create a flat, even surface. This prevents uneven settling later.
Add a Weed Barrier (Optional)
Lay landscaping fabric to reduce weed growth under your patio.
Install the Gravel Base
Spread 4 to 6 inches of crushed gravel. Compact it thoroughly with a plate compactor or hand tamper. This layer provides drainage and stability.
Add a Sand Layer
Spread 1 to 2 inches of coarse sand over the gravel. Level and compact it lightly. This layer cushions the stones and helps with leveling.
Taking the time to prepare the ground properly pays off with a patio that stays level and beautiful for years.
Tips for Laying Stones Like a Pro
When it’s time to place your stones, keep these tips in mind:
Mix Stone Sizes and Shapes
Combining different sizes and shapes creates a natural, organic look. Avoid uniform patterns unless you want a formal style.
Check Level Frequently
Use a level to ensure each stone sits flat. Adjust by adding or removing sand underneath.
Leave Consistent Gaps
Aim for 1/4 to 1/2 inch gaps between stones. This space allows for joint filling and slight movement.
Cut Stones Carefully
Use a wet saw or chisel to trim stones for tight fits around edges or obstacles.
Work in Small Sections
Lay stones in manageable areas to maintain control and quality.
Step Back and Review
Periodically step back to see the overall pattern and make adjustments.
Maintaining Your Natural Stone Patio
Once your patio is installed, keeping it in great shape is simple:
Sweep Regularly
Remove leaves, dirt, and debris to prevent stains and moss growth.
Wash Occasionally
Use a garden hose or mild detergent to clean the surface. Avoid harsh chemicals.
Replenish Joint Sand
Over time, sand between stones may wash away. Sweep in fresh sand as needed.
Seal Every Few Years
If you applied a sealant, reapply it every 2 to 3 years to maintain protection.
Address Weeds Promptly
Pull weeds from joints before they take root.
With a little care, your natural stone patio will remain a stunning focal point of your outdoor space.
Bringing Your Outdoor Vision to Life
Installing a natural stone patio is a rewarding project that transforms your yard into a welcoming retreat. By following these steps, you create a durable, beautiful space perfect for relaxing or entertaining. If you want expert help or a flawless finish, consider professional services specializing in natural stone patio installation.
Your outdoor space deserves the best. With patience and care, your natural patio installation will be a source of pride and enjoyment for years to come. Happy building!


Comments